
Any photographer you talk to you are going to find that they are pretty loyal to recommending their own chosen make of camera and I’m no different in that respect! However, if you are looking for particular attributes out of your wildlife photography equipment, there are some good reasons to look at the gear that I choose.
This post contains affiliate links. Making a purchase through these links earns a small commission at no additional cost to you and is a great way of showing your support for this site.
The Best Camera for Wildlife Photography
If you are the kind of wildlife photographer who is fairly active then you might be interested in gear that is compact and lightweight. Personally, when I’m out on a shoot there’s no telling how long I might walk or how rough the terrain might end up being if I’m trying out a new location, so I simply don’t want to be lugging around heavy gear. And wildlife photography is synonymous with heavy gear!
Enter the OM range.
OM, which were formally Olympus, are mirrorless cameras with a smaller sensor known as Micro 4/3. This means that the cameras are not only lighter with no mirror to move out of the way like a DSLR, but can be fit into a more compact package. They also have the added appeal of being cheaper than their full-size competitors, making it a really affordable camera for wildlife photography. All while still packing one hell of a punch into a small package that offers the same capabilities. These are perfect for the active photographer, or someone looking to move up from the point-and-shoot compact cameras but is deterred by the DSLR package.
In my journey with this brand I have moved from the EM10 to the EM5 and most recently the OM5, which I found had some fantastic improvements from the capability of the EM5. The OM5 body only will set you back less than $2000.
While the Micro 4/3 cameras will be less sensitive in low light due to the sensor size, this can be managed by understanding how to manipulate your settings and adjusting in post processing.
The Best Wildlife Photography Lenses
There are 2 schools of thought regarding the best lenses for wildlife photography, but what there is no argument on is that there needs to be a big lens in the kit!
When it comes to what that is wildlife photographers tend to lean to either a prime (consistent focal length) or a zoom (varying focal length.) Prime lenses are often a fraction sharper, but they are also heavier and more expensive when you are talking about the big lenses. My personal preference is for a zoom lens as I prioritise the flexibility of being able to change my focal length, rather than needing to change lenses in the field.
100-400 IS
The biggest of the lenses in my collection the 100-400 IS is a great performer, but is let down slightly by the 6.3 widest aperture when fully extended. You can manage this with bumping the ISO and using exposure compensation, and the focal length is only topped by the significantly heavier and more expensive 150-600mm. While I haven’t shot with the 150-600mm, I have had a close look at it side by side with the 100-400 IS. I didn’t feel that it added a lot to my capabilities to justify the expense. Weighing in at just over a kilogram the 100-400 IS is the lens for lightweight versatility which is also compatible with OM’s teleconverter options. OM has just released a version 2 of this lens with some performance upgrades.

40-150mm pro
When I was tossing up a new lens purchase it was this one that I ultimately chose over the 150-600 because I felt it gave me capabilities I didn’t yet have, rather than just extending them.
The 40-150mm pro is a terrific lens and I have been having so much fun playing with it! With an aperture of 2.8 available the full focal length range, this lens really comes in handy for night wildlife photography and in low light conditions. Interestingly, unlike my other zoom lenses all the zoom happens within the lens, rather than extending the length of the lens with the focal length. This should make the lens less susceptible to lens shake at lower shutter speeds.

75-300mm
While its not often on my camera these days, the 75-300mm is a really nice lens that definitely still has its place in my kit. It is significantly lighter and smaller than the 100-400 which makes it great for throwing in the bag when you are trying to keep the weight down, and indeed I’ll still opt to shoot with it when I am in motion, such as on a boat, as it is much easier to hold the lighter lens steady.
30mm Macro
While it’s been a while since I cracked out the macro lens it’s a beautiful sharp lens in the right circumstances, perfect for the really close up shots.

The Best Wildlife Photography accessories
Cross body strap
If you’re carrying around big lenses, even on the OM, a cross-body strap is a must to distribute the weight across your shoulder rather than hanging off your neck.
These screw into the tripod point on the camera and enable sliding the camera up and down the strap for fluid and secure shooting.
There’s a variety of different options for these depending on your preferences, but I like the Promaster Swift Strap.
CPL Filter
If you’ve checked out my favourite tips for wildlife photography you’ll know there’s times when I’ll shoot in the harsh light of the middle of the day and figure that if it’s the only time you have available its better than not shooting at all.
A CPL filter can come in handy for this. If you aren’t familiar with filters you can think of them as sunglasses for your lens, so they can be really effective at cutting out some of the glare in harsh light. I’m a fan of Neewer gear for being good quality and relatively inexpensive. Be sure to check the thread size of your lens – the 72mm CPL filter will fit both the 100-400mm and the 40-150mm 2.8 pro.
monopod
If you’re walking round with a big lens, whether its OM or one of the bigger brands, it might be worth thinking about a monopod to help you distribute some of the weight.
1.4 teleconverter
While I have this in my kit it’s not a tool I’ve played with a great deal. It is only compatible with certain lenses, the 40-150mm and the 100-400mm IS being 2 of them, and will extend the maximum focal length on the 100-400mm to 560mm for the trade-off of 2 stops of light. If you are normally shooting at around the f8 mark anyway this might not pose an issue for you, but it will reduce the options you have available for more light so this is a tool to crack out when the light is really good!
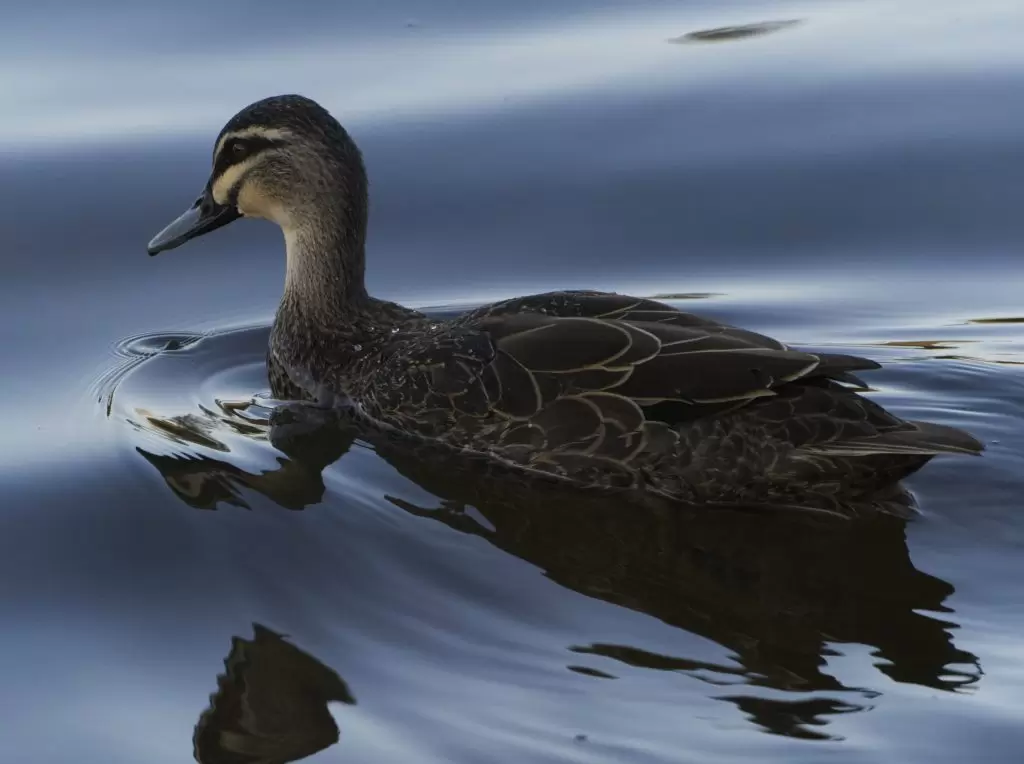
The below image was shot in the middle of the day with the teleconverter and full lens extension for 560mm and f9 then cropped. It wasn’t the sharpest of images, and needed some help from Topaz to get it to the point below. While it definitely has its uses over those really long distances, it’s also more between your sensor and lenses which you’ve no doubt spent quite a bit of money on, so there is always going to be a sharpness tradeoff. For me at least this isn’t an every day tool.

What’s in your essentials kit for wildlife photography? Let me know in the comments!
